04 November 2026
Why a Security Camera Layout Tool Makes Site Planning More Reliable
Presented by @mysecuritycameralayouttooldeck
The Gap Between Sketching and Installing
Every CCTV installer I have worked with over the years has a story about a job that looked straightforward on paper but turned into a mess once the cameras went up. Maybe the field of view was blocked by an awning nobody measured. Maybe the cable run from the PoE switch to the last IP camera came up twenty meters short. Or maybe the mounting height on the wall made the lens angle useless for identifying faces at the entrance. These problems are not about bad equipment. They are about bad planning. The difference between a smooth install and a painful one often comes down to how you approach the layout before anyone climbs a ladder.
A proper site survey helps, of course. Walking the property, noting structural obstacles, checking light conditions at night, and measuring distances from the DVR or NVR room to each drop location are all essential. But even a thorough survey only gets you so far if you are trying to visualize coverage across multiple zones. That is where a security camera layout tool becomes the bridge between what you measured and what the system will actually see.
Moving Beyond Guesswork
Early in my career I used to print floor plans and draw little triangles for camera fields of view with a sharpie. It worked for small residential jobs, maybe three or four analog cameras going into a basic DVR setup. But once I started working on commercial sites with twenty or more IP cameras, mixed resolutions, different lens sizes, and specific coverage requirements for insurance or compliance, that method fell apart. Triangles on paper do not account for lens distortion, mounting height, or the way a corridor shape changes the effective field of view at the far end.
A security camera layout tool solves that by letting you place virtual cameras on a scaled map or imported floor plan and see exactly what each camera will cover. You can adjust the lens calculator to match the actual sensor size and resolution of the model you plan to use, whether it is a 2.8 mm wide angle or a 12 mm telephoto. You can set the mounting height and tilt angle, and the tool recalculates the coverage map in real time. That level of detail saves hours of rework later. And it is not just about avoiding mistakes. It also helps you justify the design to a client who wants to understand why a certain camera needs to go exactly there, or why you specified a higher resolution model for a particular zone.
What a Good Tool Should Let You Do
Not all layout tools are equal. Some are basic drag-and-drop apps that let you place icons on a picture and call it a day. Others, like the browser-based CCTVplanner, offer a much deeper set of features that mirror real-world installation constraints. Here are the capabilities I look for when I evaluate a security camera layout tool:
- Import a floor plan or use a scale map, then place cameras with exact coordinates and mounting heights.
- Adjust the lens calculator to match the specific camera model, sensor size, and resolution, so the field of view and pixel density are accurate.
- Generate a coverage map that shows blind spots, overlapping zones, and the effective detection distance for each camera.
- Create a bill of materials that includes the cameras, NVR or DVR, PoE switch, cabling, and mounting accessories.
- Export the design as a CAD export or a client-ready PDF that includes the quote generator output for pricing.
When a tool includes all five of those capabilities, it stops being a simple diagramming aid and becomes a real design engine. You can run what-if scenarios. You can swap a Hikvision model for a Dahua model and see how the field of view changes. You can plan the cable run from the PoE switch to each camera and make sure the total distance stays within Ethernet limits. You can even check that the mounting height you chose gives the right angle for license plate capture or facial recognition at the gate.
Real-World Examples That Show the Difference
I worked on a warehouse project last year where the client had already bought a set of Axis Communications bullet cameras based on a general recommendation from a distributor. They assumed the cameras would cover the aisles because the spec sheet said the horizontal field of view was 90 degrees. But when I ran the numbers through a security camera layout tool, it became clear that the mounting height on the warehouse columns and the distance between rows would leave large blind spots in the middle of the floor. The field of view on paper did not account for the fact that the cameras were mounted at six meters, which narrowed the effective ground coverage compared to a standard three-meter eave mount. We ended up swapping to a mix of Uniview dome cameras with wider lenses and adding a few extra units to fill the gaps. The client was skeptical at first, but after the install they admitted the coverage map from the tool matched exactly what they saw on the monitors.
Another job involved a school campus that needed coverage for multiple buildings, parking lots, and pedestrian pathways. The integrator had drawn the layout by hand and sent it to the client for approval. The client requested changes that forced a complete redesign of the camera placement and cable routing. Instead of starting from scratch, I imported the floor plans into a layout tool, adjusted the camera positions, and regenerated the coverage maps and bill of materials in under an hour. The CAD export went straight into the construction drawings. The quote generator produced a new price list that accounted for the longer cable runs and the additional PoE switch ports. That kind of turnaround is impossible with manual methods.
The Role of Camera Types and System Compatibility
One detail that often gets overlooked in the layout phase is the difference between IP cameras and analog cameras, and how that choice affects the rest of the system. If you plan a site around analog cameras, you are limited by the DVR inputs and the coaxial cable runs. You can still get good coverage, but the resolution and feature set are lower. With IP cameras, you gain flexibility in placement because you can run power over the same Ethernet cable using a PoE switch, and you can extend the distance with intermediate switches or fiber converters. The layout tool needs to handle both scenarios. When I design a system that mixes Hikvision and Dahua cameras, or includes a mix of indoor and outdoor units with different IR ranges, I need to see whether the mounting height and cable run assumptions hold for each device type.
A good layout tool also helps you plan the logical topology. Where does the NVR sit? Does every camera connect back to a central PoE switch, or do you use edge switches in remote buildings? How do you route the cable run through conduit or above ceilings? These decisions affect the material list and the labor estimate. If the tool cannot account for cable distances and switch port counts, you are still guessing on the most expensive part of the job.
Keeping the Client in the Loop
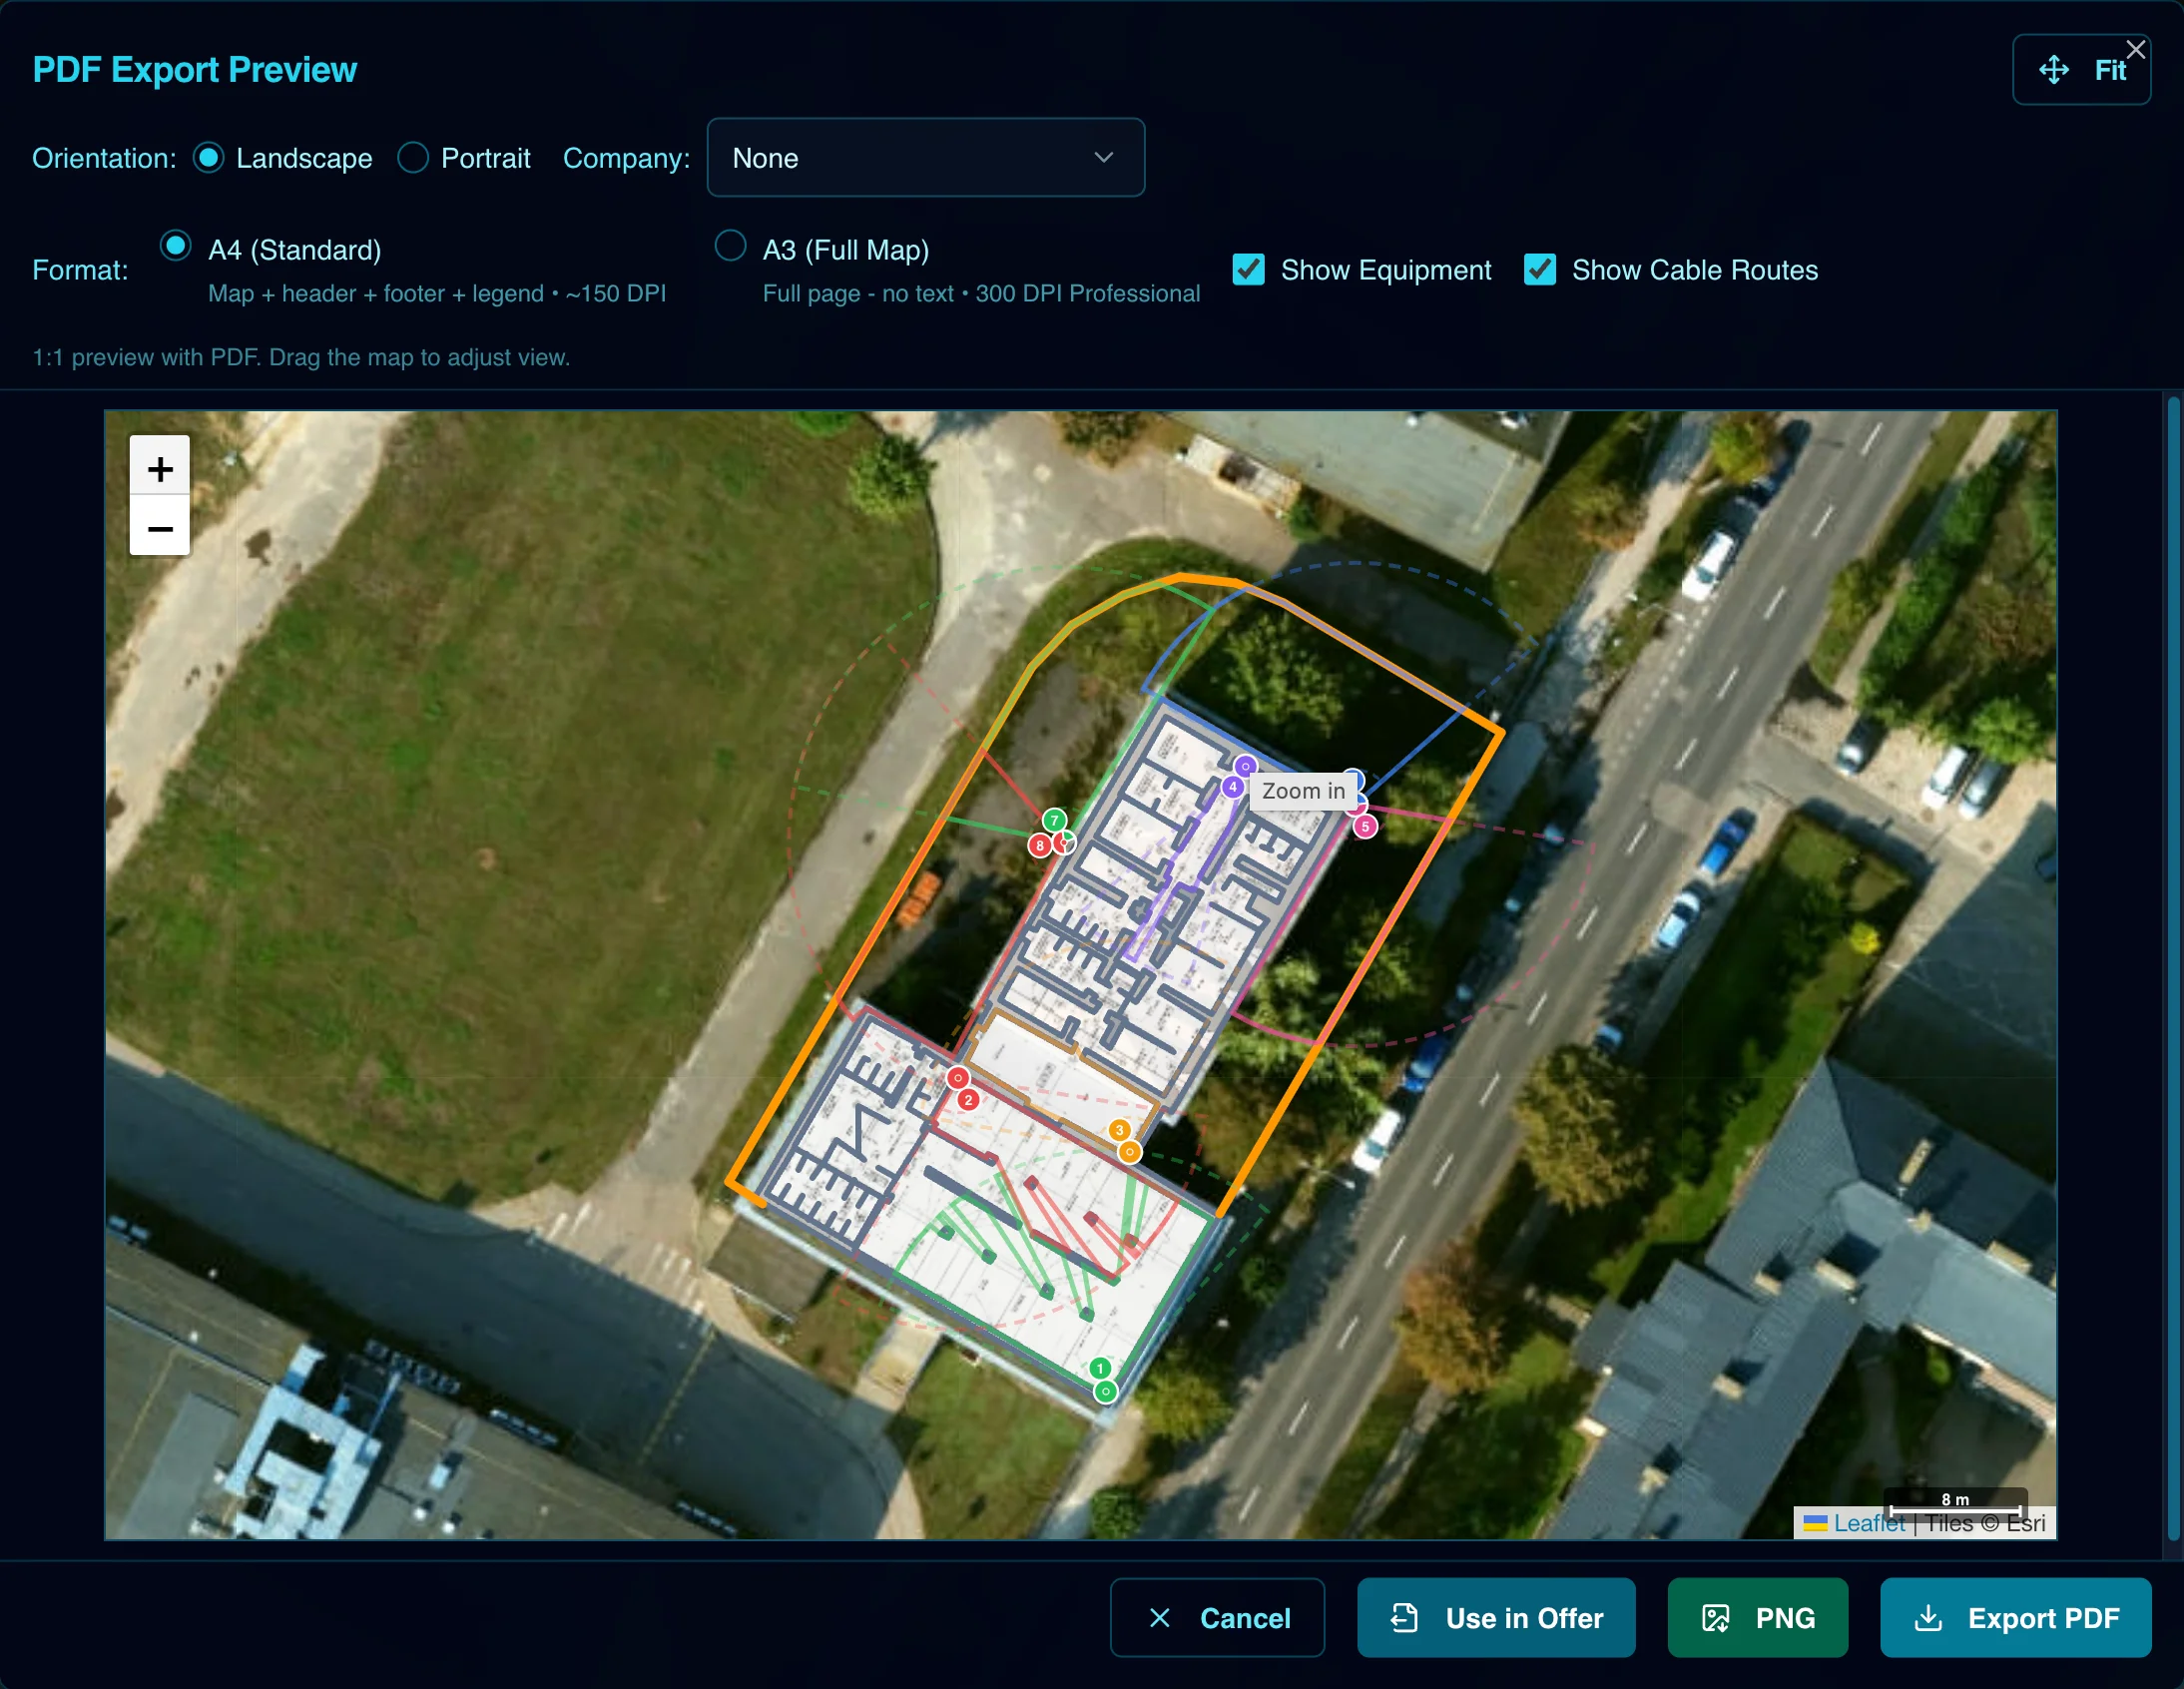
Client communication is another area where a security camera layout tool adds real value. A coverage map printed on an A4 sheet with color-coded zones and lens calculator annotations is much easier to explain than a verbal description of where you think the camera will point. I have found that clients who see the coverage map during the design phase are less likely to request changes after installation. They understand the trade-offs. They see that putting a camera in the corner of the parking lot gives a wide view but reduces the pixel density for reading license plates at the far end. They also see that adding one more camera in a specific spot solves the problem without having to buy a more expensive zoom lens for every unit.
Some layout tools include a quote generator that pulls the equipment list directly from the design. That eliminates the back-and-forth of matching a parts list to a drawing. The client gets a single document that shows the camera placement, the field of view for each camera, the cable routing, and the total cost. When you combine that with a CAD export that the architect or general contractor can import into the building plans, the whole project moves faster and with fewer misunderstandings.
Practical Lessons from the Field
I have found that the best way to learn a layout tool is to take a site you have already completed and rebuild it inside the software. Compare the coverage map the tool generates to the actual recorded footage. You will almost certainly spot places where the real-world installation differs from the plan. Maybe a pillar blocked part of the view that you did not account for. Maybe the lens calculator showed a theoretical range that the actual camera could not achieve in low light. Those discrepancies teach you how to adjust your inputs next time. Over a few projects, you develop a feel for the margin of error you need to build into every design.
Another lesson is to always run the cable run calculation before finalizing the PoE switch location. I once designed a system for a retail store where the NVR room was at the back of the building, and the farthest camera was at the front entrance, about 110 meters away. The tool flagged that the distance exceeded the 100-meter limit for standard Ethernet over copper. We moved the PoE switch to a utility closet midway and used a fiber link back to the NVR. That single change saved the client from buying a pair of long-range extenders and avoided a performance problem that would have shown up during testing.
A Tool That Grows With Your Work
The best security camera layout tools are not static. They get updated with new camera models, new lens calculators, and better export formats. If you work with multiple brands like Bosch Security, Axis Communications, or Uniview, you want a tool that includes those models in its database or lets you add custom specs. You also want a tool that supports both metric and imperial units, because not every site survey uses the same system. Little things like that save time and reduce errors.
At the end of the day, a layout tool is a multiplier for your experience. It does not replace the judgment you develop by walking dozens of sites and troubleshooting coverage gaps. But it does make your judgment more accurate and your proposals more convincing. If you are still sketching coverage zones by hand, or relying on the distributor to tell you what lens to use, consider spending an hour with a proper security camera layout tool. It will change how you plan every job from then on.